Launch your first funnel from domain to test click
This walkthrough is for an operator setting up a funnel on their ATracker instance for the first time: go from a tracking domain to a click that appears in Logs. We do not cover internal tracker architecture — only admin steps and how to verify the result.
When to use it. New instance, new teammate, or new vertical: you have (or need) a domain, but the network, source, and campaign are not ready yet. The goal is a working campaign URL and proof that a click was recorded.
What you need. Admin access (or roles with Domains, Affiliate Networks, Offers, Traffic Sources, Campaigns, and Logs). A tracking domain that resolves to your server, or an existing domain on the stand with DNS Verified. An offer URL from the network (a test URL is fine).
Step 1. Tracking domain
- Sidebar → Domains (
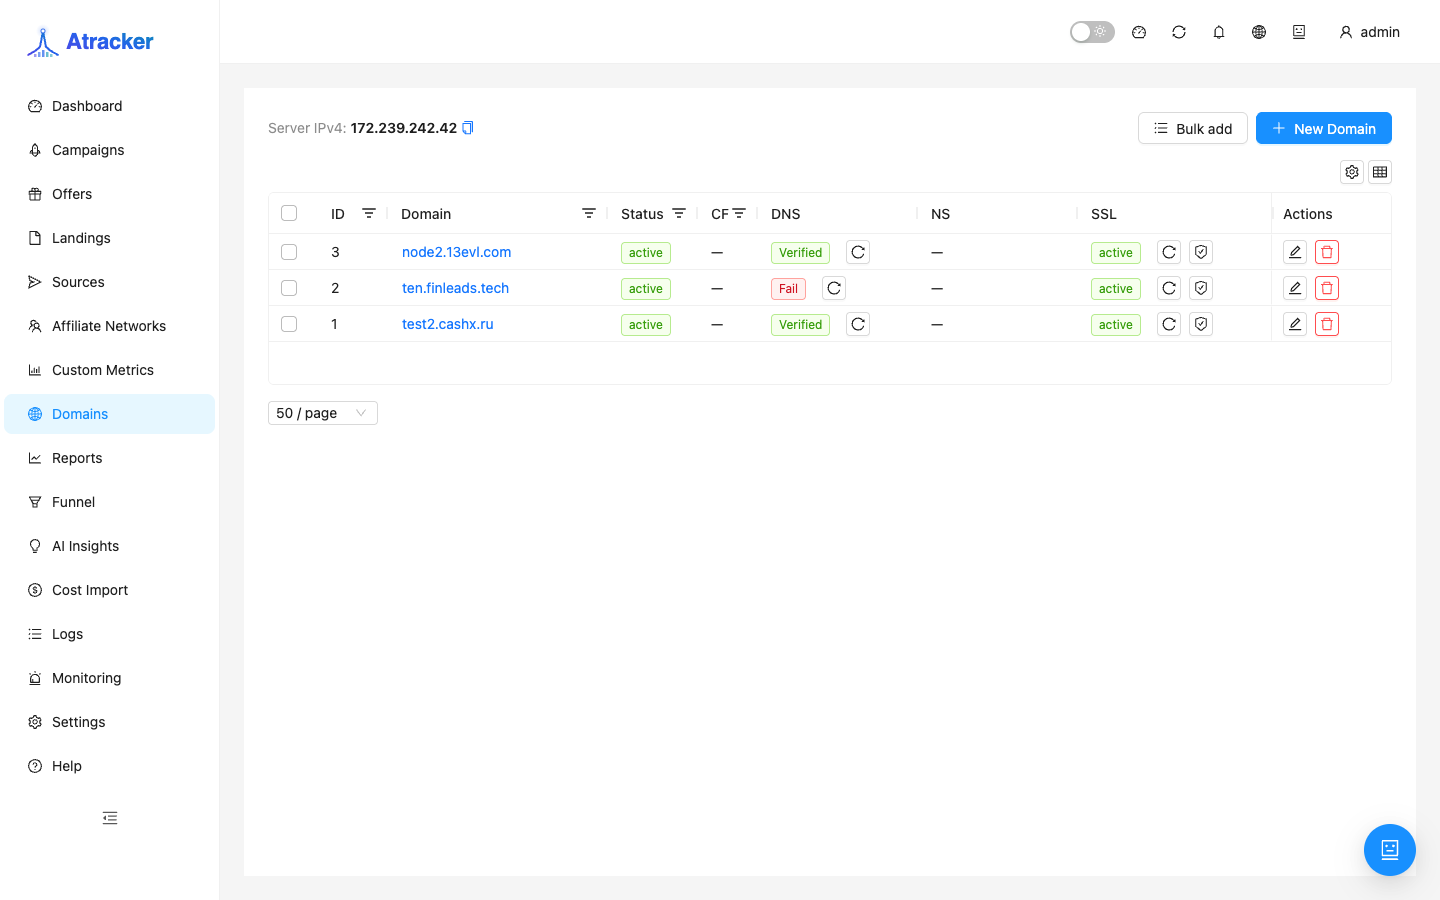
/domains). - If the domain is missing — New Domain, enter the hostname, save. Wait for DNS Verified and SSL active. Without that, the campaign URL cannot serve HTTPS or DNS has not converged.
- Remember the domain for the campaign step. The screenshot shows a working example
test2.cashx.ruwith Verified status.
Step 2. Affiliate network and postback URL
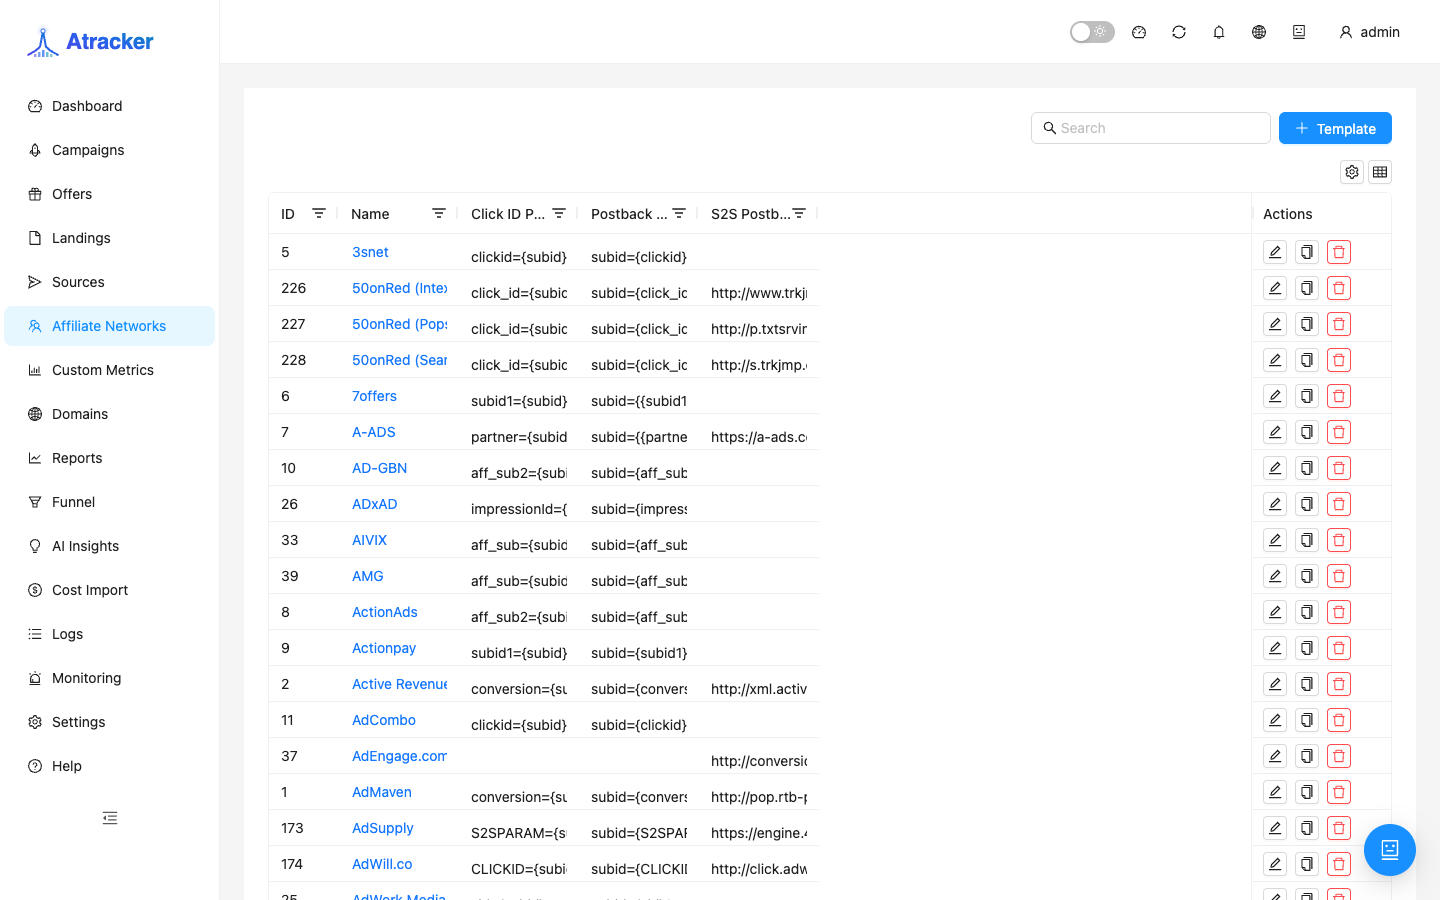
- Sidebar → Affiliate Networks (
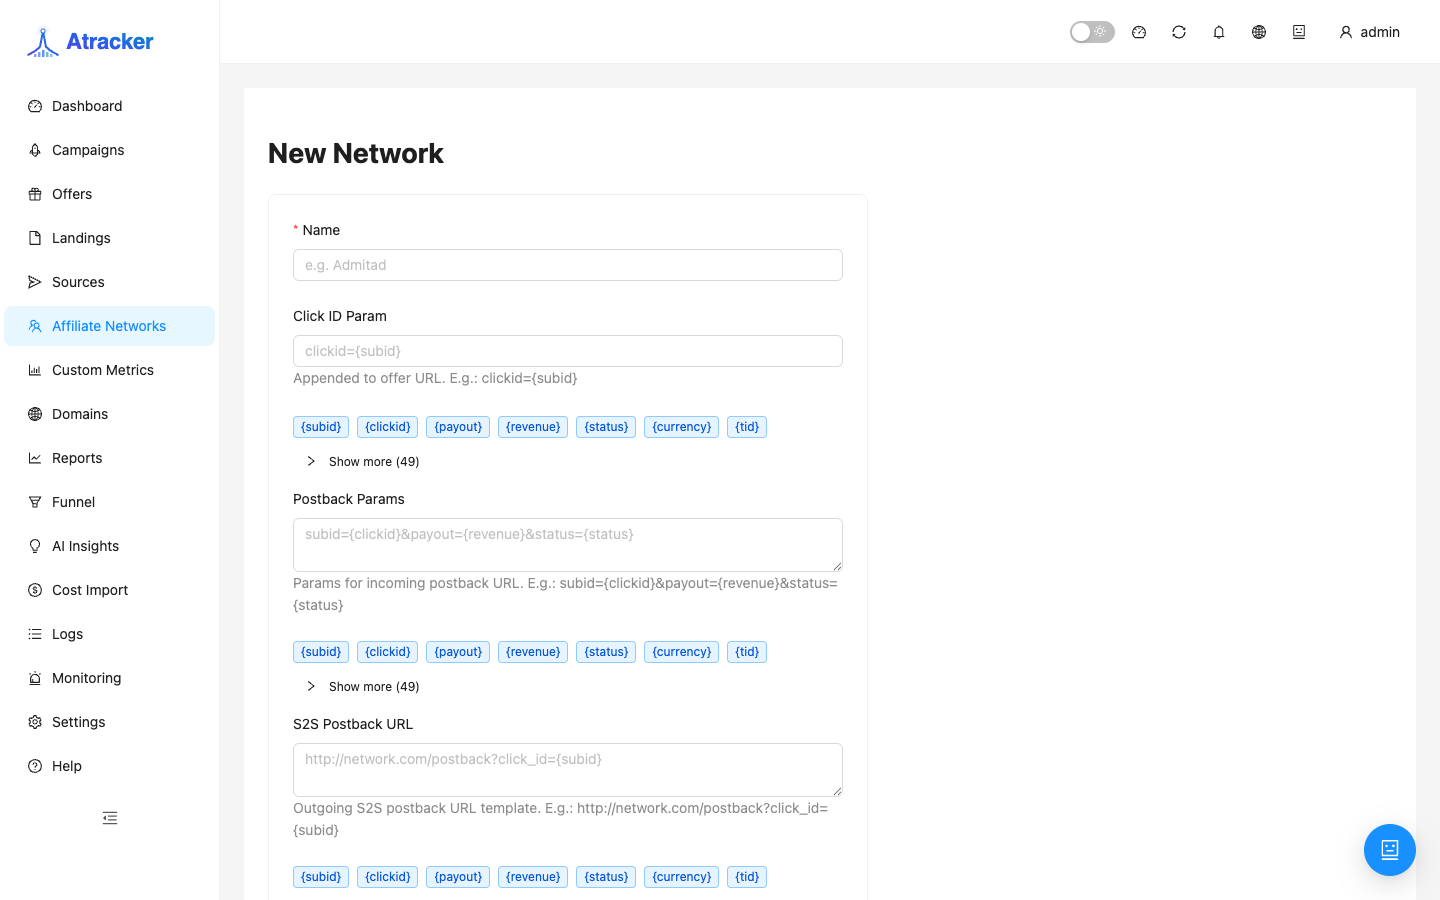
/affiliate-networks). - Template (or equivalent) → network name, postback parameters (
subid,status,payoutas your network expects). - Copy the postback URL from the network card into the partner dashboard. Without an inbound postback, conversions will not reach the tracker (see the debugging article).
Step 3. Offer with a clickid macro
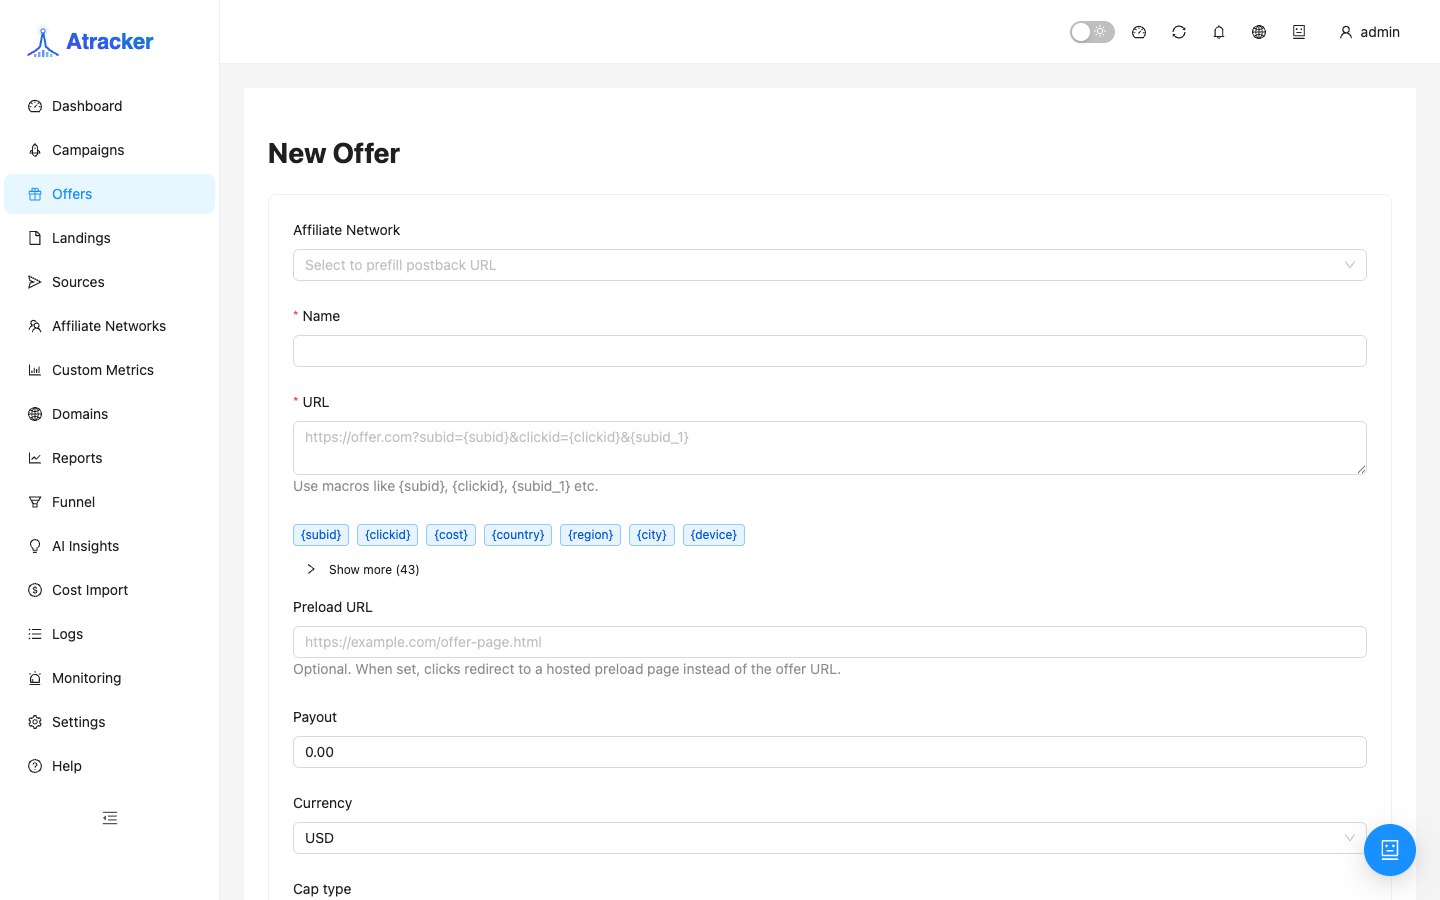
- Sidebar → Offers → Create (
/offers/new). - Set a name, pick the Affiliate network from step 2.
- In URL, paste the partner link with
{subid}or{clickid}— the macro the tracker replaces on redirect. Without it, the network cannot attribute conversions to the click. - Set payout (a fixed test value is fine), save.
Step 4. Traffic source
- Sidebar → Sources (
/traffic-sources) → Create. - Pick a template (Facebook, Google, Custom) or map sub_id parameters manually — they flow into reports and outbound postbacks to ads when you enable S2S.
- Save the source. For a first launch, a name and defaults are enough.
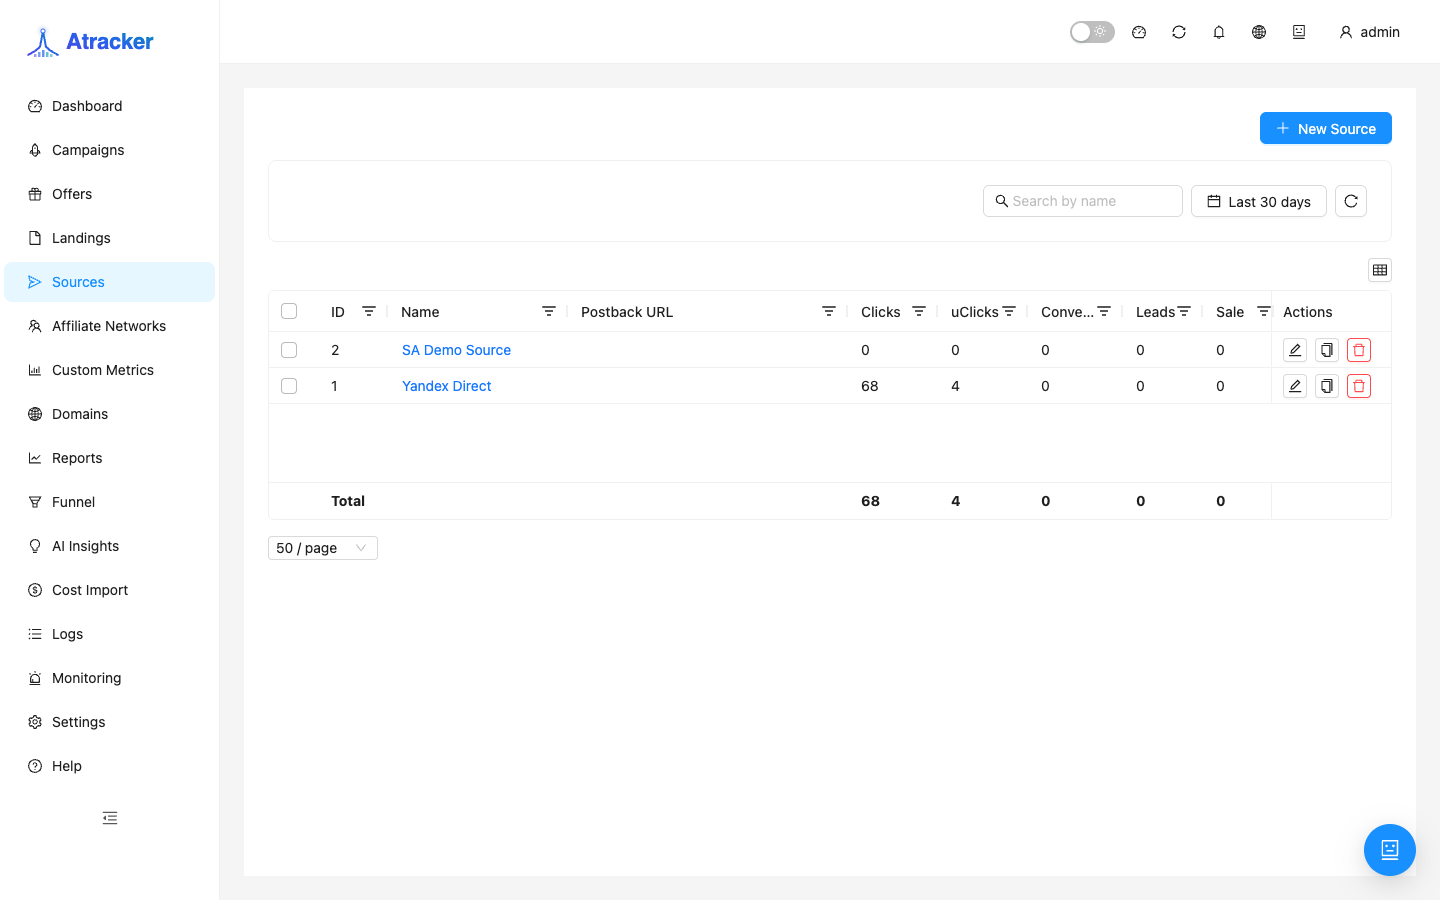
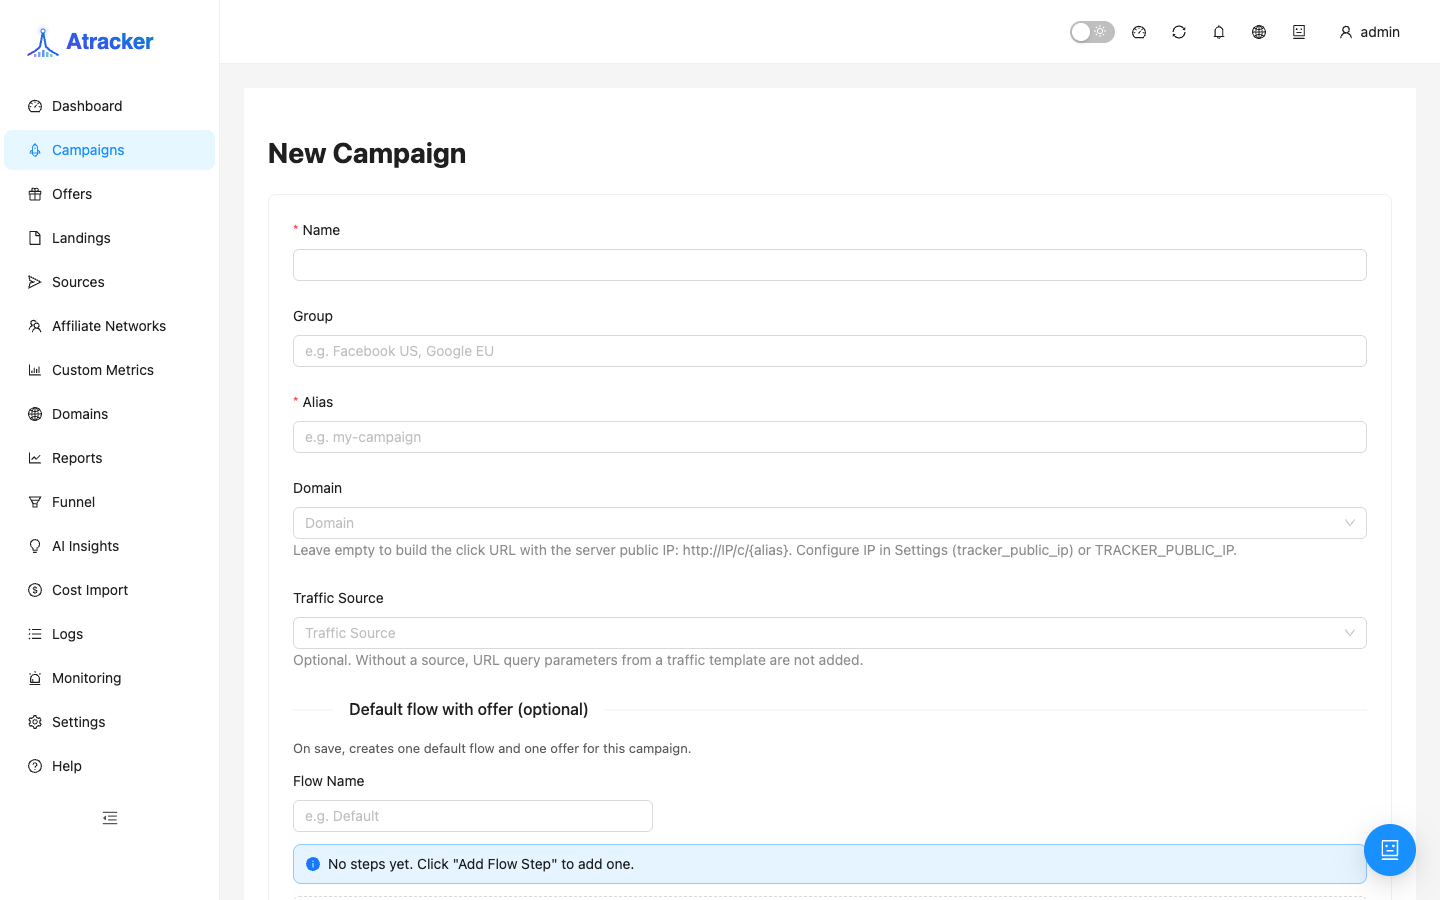
Step 5. Campaign
- Sidebar → Campaigns → New Campaign (
/campaigns/new). - Fill Name, required Alias (unique, used in the URL), Domain from step 1, Traffic source from step 4. Optionally set cost model (CPC/CPM) for later reports.
- Save — the campaign editor opens.
Step 6. Flow (traffic path)
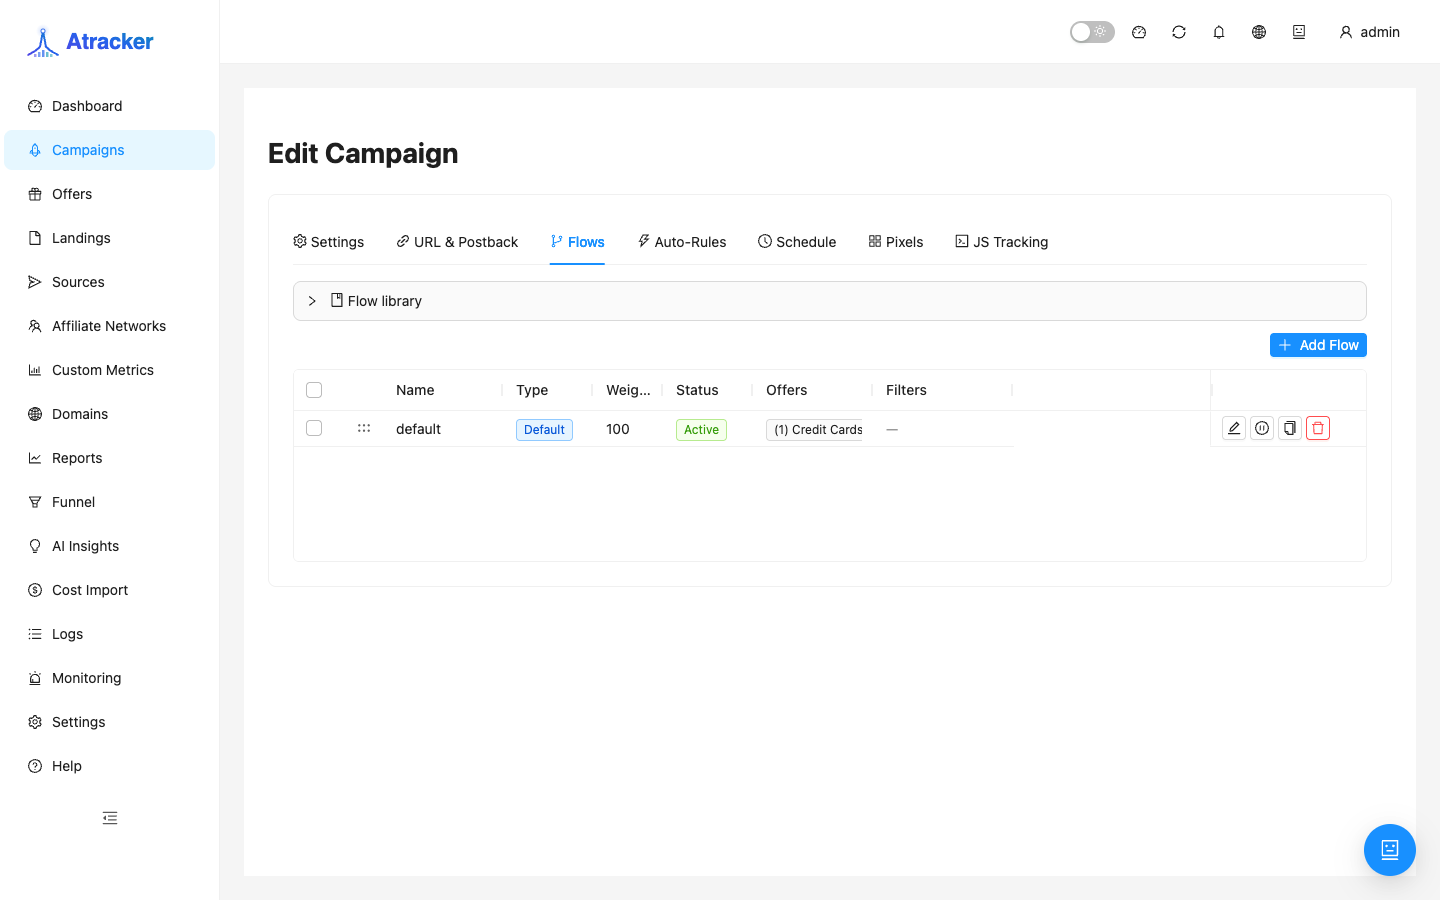
- In the campaign editor → Flows tab.
- If empty — Add Flow. Simple direct setup: one offer step → your offer. With a prelander: landing then offer.
- Ensure the flow is Active, weight 100% (or your split). Save.
Step 7. Campaign URL and campaign postback
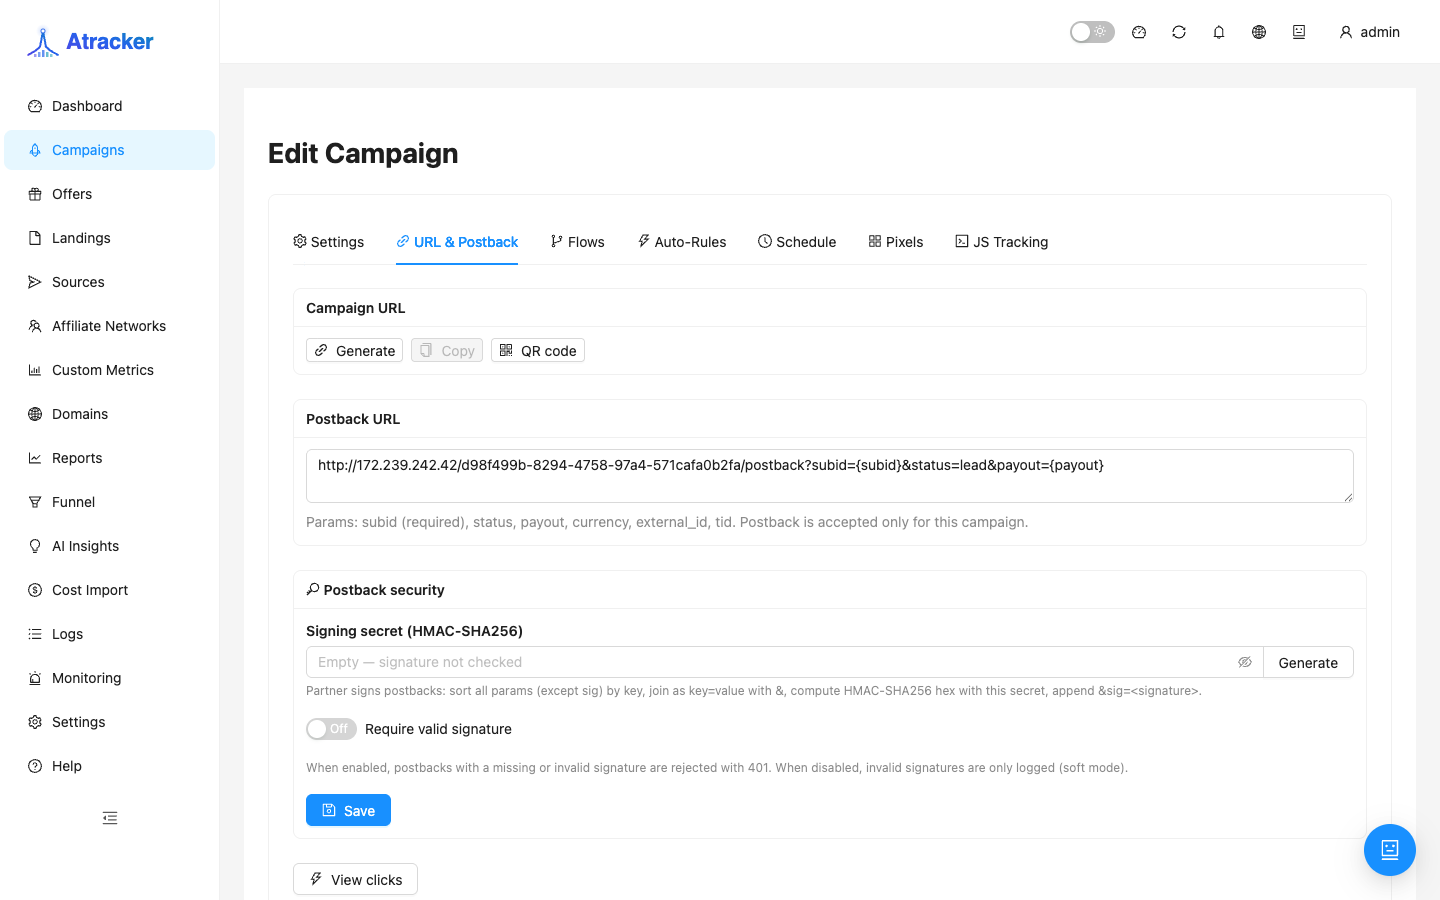
- URL & Postback tab.
- Click Generate if Campaign URL is empty. Copy the link for the ad platform or a manual test.
- The postback URL on this tab is for manual test conversions (substitute a real subid from the click log). Paste the network postback from Affiliate Network (step 2) into the partner cabinet.
Step 8. Test click and verify in Logs
- Fire a click: open the campaign URL in a browser; use Simulate on the campaign list if available; or send the link to a test ad account.
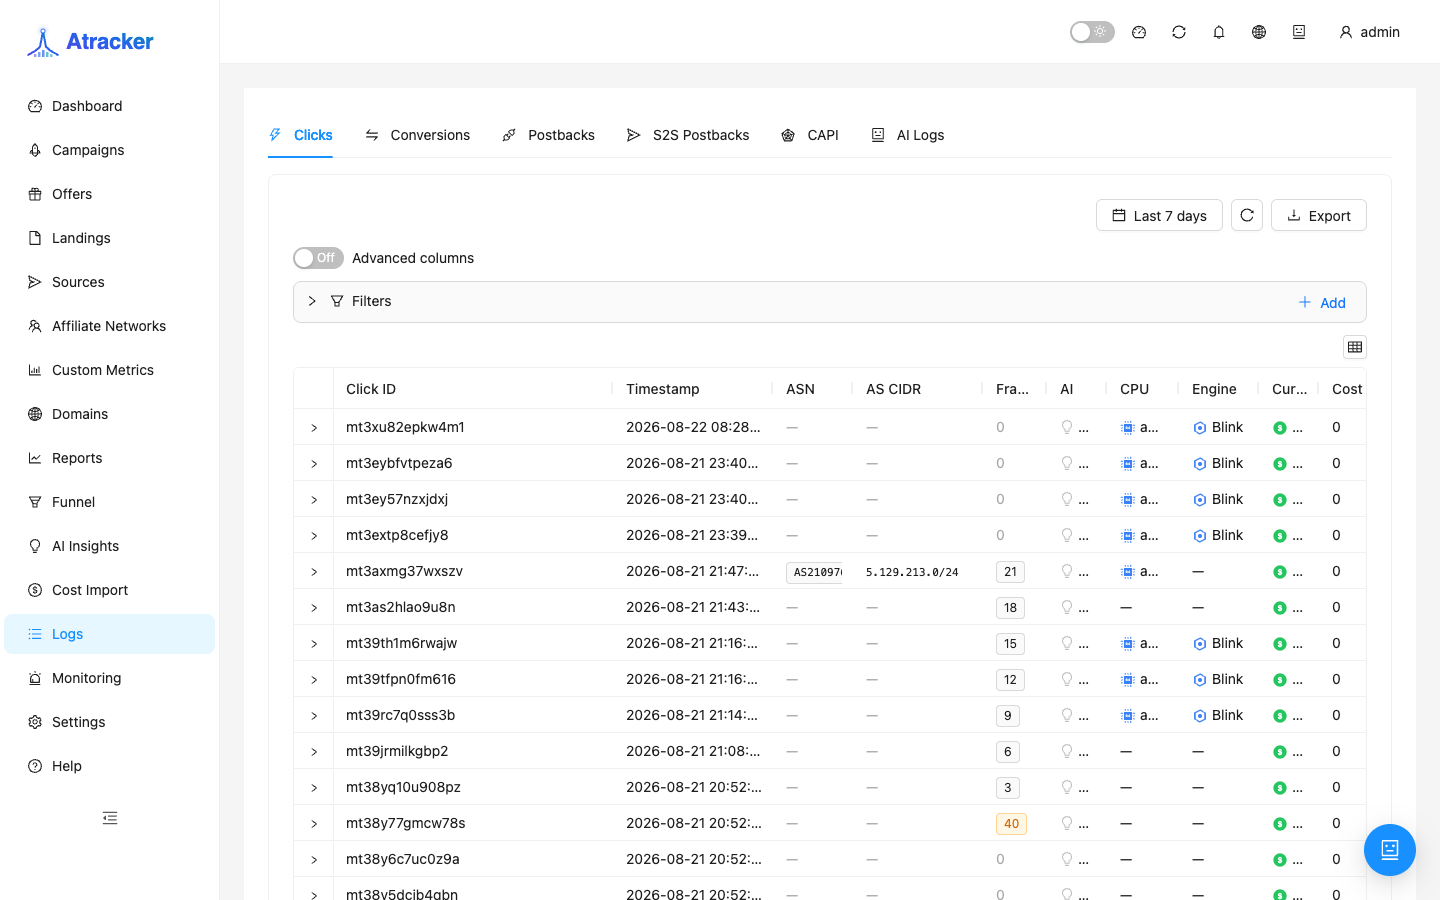
- Sidebar → Logs (
/logs), Clicks tab. Period — Today or Last 7 days. Filter by campaign. - You should see a fresh row with a Click ID (subid). Only then trust Dashboard/Reports aggregates — summaries without a click in logs are misleading.
Common first-launch issues
- No click in Logs. Domain DNS not Verified, wrong domain on the campaign, empty flow, or campaign paused. Open the URL manually — no 5xx on the tracking domain.
- URL does not generate. No domain selected on the campaign or domain not active.
- Redirect to offer without subid. Check the offer URL macro and that the flow points to the right offer.
- Onboarding modal after first superadmin login blocks clicks — close Skip / Finish later.
Next: test postback and conversions — see Clicks but no conversions. Entity reference — documentation.